


Pour Over Coffee for Camping: A Ritual Under Open Sky
The first light filters through pine needles, casting long shadows across your tent. Your breath mists in the cool air as you reach for your pack, fingers finding the familiar shape of your coffee kit. This moment, when wilderness meets ritual, when the day's first pause arrives before the trail calls-this is where pour over coffee for camping lives. It's not just caffeine. It's ceremony carried in ounces, a bridge between the comfort of home and the raw beauty of the backcountry.
Pour over coffee for camping transforms morning routines into something approaching magic. Unlike instant crystals or cowboy coffee with its inevitable grit, a proper pour over extracts the nuanced flavors locked inside specialty beans while demanding nothing more than hot water, a simple dripper, and three unhurried minutes. The process itself becomes meditation: the circular pour, the bloom, the gradual draw-down through paper or metal. You're not just making coffee. You're claiming a moment back from the mountains.
Why Pour Over Wins in the Wilderness
Backpackers and car campers alike have discovered what café dwellers have known for years: pour over brewing offers unmatched control and consistency. When you're miles from the nearest espresso machine, that control becomes precious.
The method delivers several distinct advantages for outdoor enthusiasts:
- Exceptional flavor clarity that showcases the beans' origin characteristics
- Minimal cleanup with biodegradable filters or reusable mesh options
- Lightweight gear that packs smaller than most alternatives
- No moving parts to break, pump, or clog
- Adaptable technique that works at sea level or 10,000 feet
According to Backpacker magazine's comprehensive camp coffee guide, pour over methods consistently rank among the top three brewing options for serious trail coffee lovers, balancing weight, flavor quality, and simplicity.
The Weight Question
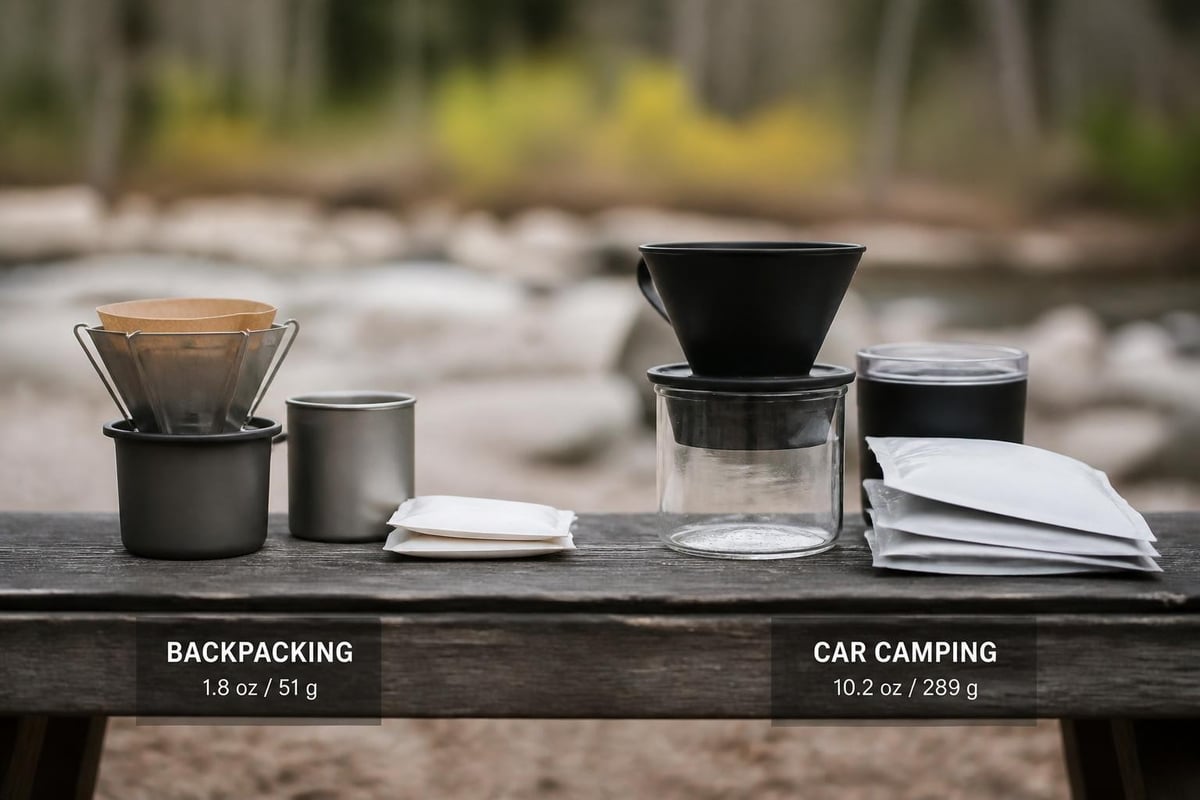
Every ounce matters when you're carrying home on your back. BackpackingLight's detailed gear analysis breaks down the math: a collapsible silicone dripper weighs roughly 0.5 ounces, paper filters add 0.1 ounces each, and pre-portioned coffee sachets eliminate the need for bulky containers and measuring tools.
Compare that to a portable espresso maker (8-12 ounces) or even an AeroPress (11 ounces with accessories), and the case for pour over becomes compelling. You're not sacrificing quality for convenience. You're choosing both.
Choosing Your Camping Pour Over System
The pour over coffee for camping market has exploded in recent years, offering options from featherweight titanium cones to origami-style paper drippers that fold flat. Your choice depends on trip length, group size, and how much you prioritize the morning ritual.
| Dripper Type | Weight | Durability | Best For |
|---|---|---|---|
| Collapsible Silicone | 0.5-1.2 oz | High | Backpacking, multi-day trips |
| Stainless Steel Cone | 3-5 oz | Very High | Car camping, base camps |
| Titanium Single-Wall | 0.6-0.9 oz | Very High | Ultralight enthusiasts |
| Disposable Paper Dripper | 0.3 oz | Single-use | Emergency backup, minimal weight |
The Tom's Guide buyer's overview notes that camping-specific drippers often feature wider bases for stability on uneven ground and graduated interior ridges that maintain proper flow rate even when the cone isn't perfectly level.
Filter Considerations
Paper filters yield the cleanest cup, removing oils and fine sediment that can turn bitter during extended contact. They're also biodegradable, though proper disposal matters (more on that shortly).
Metal mesh filters eliminate waste and pack weight over long expeditions. The trade-off? A bit more body and sediment in your cup, plus the need to clean them thoroughly between uses.
For those seeking the best of both worlds, consider pre-ground, pre-portioned sachets that include their own integrated filter system. These eliminate guesswork entirely while maintaining specialty-grade quality.
Water: The Overlooked Variable
You can carry the finest beans and the most precise dripper, but pour over coffee for camping lives or dies by water quality. Wilderness water sources vary dramatically in mineral content, pH, and dissolved solids, all of which affect extraction.
The Specialty Coffee Association's research on water chemistry demonstrates that optimal brewing water contains 50-175 ppm total dissolved solids with balanced calcium and magnesium. Mountain streams often fall below this range (too soft), while water near limestone deposits exceeds it (too hard).
Treatment and Temperature
Before you brew, you must purify. The National Park Service recommends bringing water to a rolling boil for one minute (three minutes above 6,500 feet elevation) to eliminate pathogens. Chemical treatments and filters work too, though they won't remove all contaminants-the WHO drinking water guidelines note that boiling remains the most reliable method against microorganisms.
Here's the camping coffee water checklist:
- Source from moving water when possible (streams over ponds)
- Filter through cloth or coffee filter to remove large particles
- Boil for appropriate time based on elevation
- Cool to 195-205°F (90-96°C) before brewing
- Save remaining hot water in an insulated container for second cups
That cooling step matters more than many campers realize. Boiling water scorches coffee grounds, extracting harsh, bitter compounds instead of balanced flavor. Let your kettle rest thirty seconds after the rolling boil subsides, or add a splash of cool treated water to drop the temperature into the ideal range.
The Morning Ritual, Trail Edition
Dawn breaks differently in the wilderness. The air tastes cleaner. Sounds carry farther. Your senses, freed from digital noise and climate control, wake up fully.
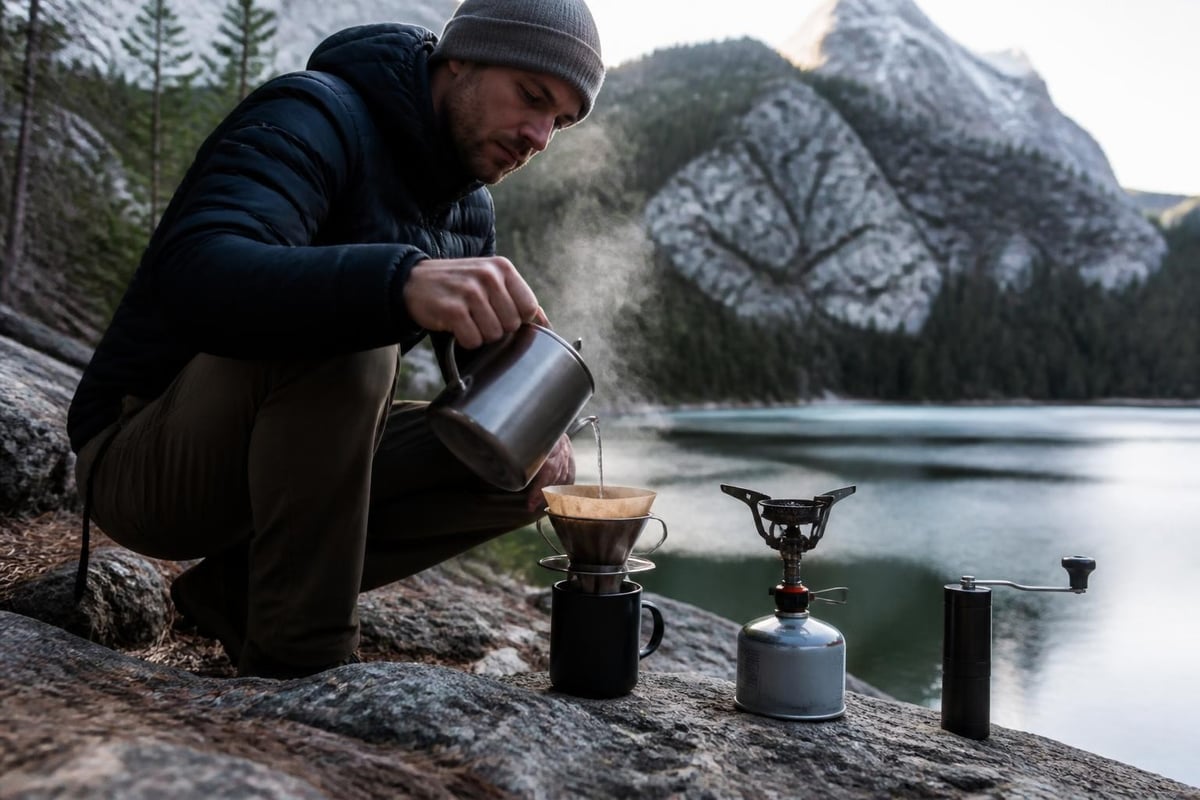
This is when pour over coffee for camping transcends technique and becomes ritual. Find a stable surface-a flat rock, your cook platform, the tailgate. Arrange your tools within reach. This deliberate preparation, this small ceremony before the day's miles, grounds you in place and purpose.
The Pour Sequence
First, the bloom. Pour just enough hot water to saturate the grounds completely, using about twice the weight of water to coffee (for a 15-gram sachet, roughly 30 grams of water). Watch the coffee swell and release trapped gases. This phase, lasting 30-45 seconds, opens the cellular structure and prepares for full extraction.
Second, the main pour. Starting from the center, spiral outward in concentric circles, maintaining a steady, thin stream. Avoid pouring directly onto the filter walls. Keep the slurry agitated but not turbulent. The total brew time should land between 2:30 and 3:30 for most roasts.
Third, the patience. Let gravity finish the work. Don't squeeze the filter or rush the final drips. Those last drops contain concentrated flavors that complete the cup's balance.
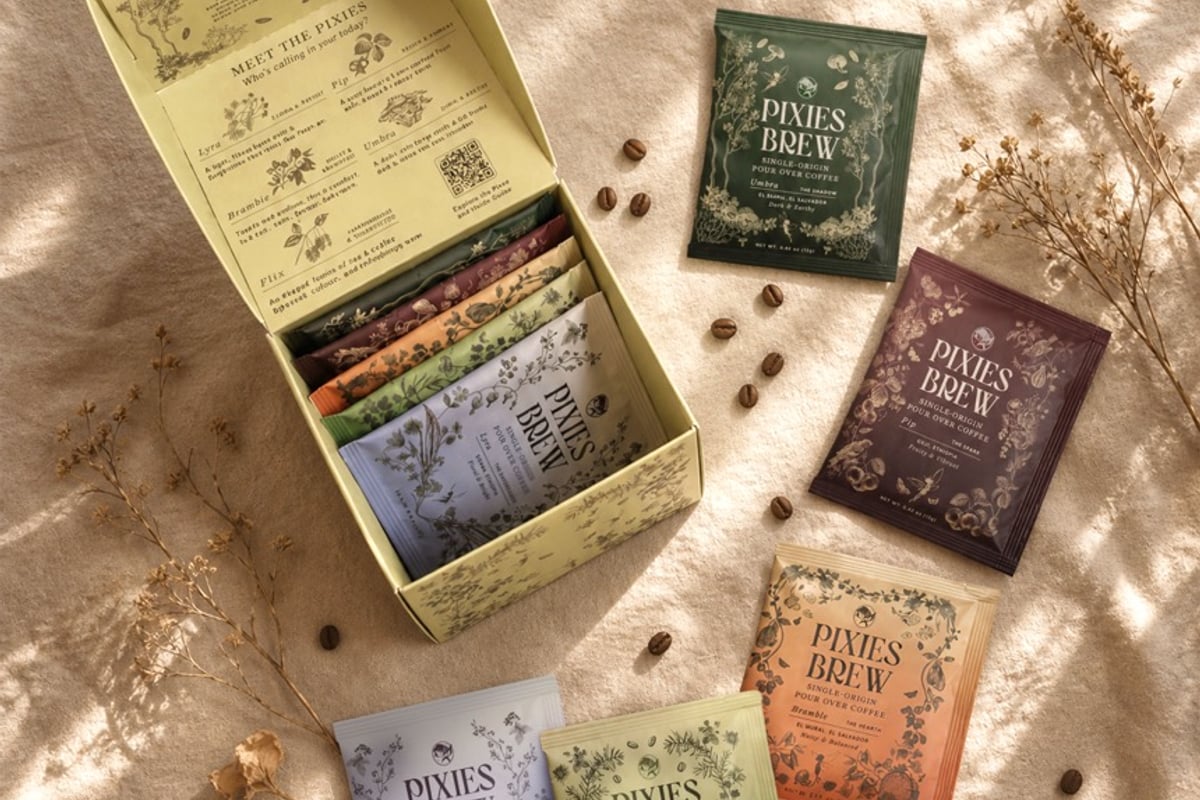
For specialty coffee lovers who appreciate this level of intentionality, the Pixies Brew Discovery Set offers nitrogen-flushed sachets pre-portioned for perfect extraction. Each sachet integrates the filter directly into the packet-rip, hook onto your mug, and pour-so you can focus on the moment rather than measuring ratios while your fingers still ache from yesterday's climb.
The sensory experience deepens outdoors. Steam rises into cold air, visible and alive. The aroma mingles with pine resin, wood smoke from last night's fire, the mineral scent of granite. That first sip tastes sharper, more vivid, as if the wilderness amplifies the coffee's essential character.
Dialing In Your Camp Brew
Elevation, temperature swings, and variable water sources mean your home brewing ratios may need adjustment. Pour over coffee for camping requires flexibility alongside precision.
Key variables to monitor and adjust:
- Grind size: Slightly coarser at high elevation where lower boiling points reduce extraction
- Brew time: Extend by 15-30 seconds in cold weather when heat dissipates faster
- Coffee dose: Increase 10-15% if your water is exceptionally soft (low mineral content)
- Bloom duration: Extend to 45-60 seconds for very fresh-roasted beans, which release more CO2
Keep notes in your trail journal. "Flux blend, 8,200 ft, 45-second bloom, 3:15 total time, excellent" teaches you patterns across trips. Over time, you develop instinct that transcends recipes.
When Things Go Wrong
Over-extracted (bitter, harsh, astringent)? Your water was too hot, the grind too fine, or the pour too slow. Next time, let the boiled water rest longer, or pour in wider spirals to speed draw-down.
Under-extracted (sour, thin, tea-like)? Your water cooled too much, the grind was too coarse, or you poured too quickly. Insulate your brewing vessel, maintain a steady medium stream, and ensure full saturation during the bloom.
Uneven extraction? You probably poured too aggressively on one side or let the bed drain too low before completing the pour. Aim for a flat coffee bed after draw-down-a telltale sign of even extraction.
Leave-No-Trace Coffee Ethics
The U.S. Forest Service research on visitor impact includes specific guidance about food and beverage waste in wilderness areas. Coffee grounds and filters fall into a gray zone: technically biodegradable, but problematic when concentrated near popular campsites.
Responsible disposal methods ranked by impact:
- Pack out used grounds and filters in a sealed bag (lowest impact)
- Scatter cooled grounds widely at least 200 feet from water, trails, and camp (medium impact)
- Bury grounds 6-8 inches deep following cathole guidelines (acceptable in some areas)
- Leave grounds near fire ring (unacceptable-attracts wildlife, alters soil chemistry)
Paper filters break down faster than coffee grounds themselves. The cellulose typically decomposes in 2-4 weeks under optimal conditions, though high-elevation environments with short growing seasons may require months. If you're brewing for a group in a popular backcountry zone, pack everything out.
Metal filters eliminate the disposal question entirely but require thorough rinsing. Use grey water protocols: dispose of rinse water at least 200 feet from lakes and streams, dispersed over a wide area.
The Social Cup
Pour over coffee for camping often becomes the gathering point. Your tentmate hears the hiss of the stove, smells the first bloom, and emerges sleep-rumpled but hopeful. The couple from the next site wanders over, mugs in hand, drawn by the aroma.
This is when carrying a slightly larger dripper or a second brewing system pays dividends in connection. Coffee culture transcends trailheads. The ritual slows everyone down, creates space for stories about yesterday's miles and today's plans.
Consider brewing technique as campsite gift. That struggling group with instant crystals and regret? Offer to brew them a proper cup. The ratio of gratitude to effort exceeds almost any other camp kindness. You're not just sharing caffeine. You're sharing care, competence, and a moment's luxury in rough country.
Gear Organization and Packing
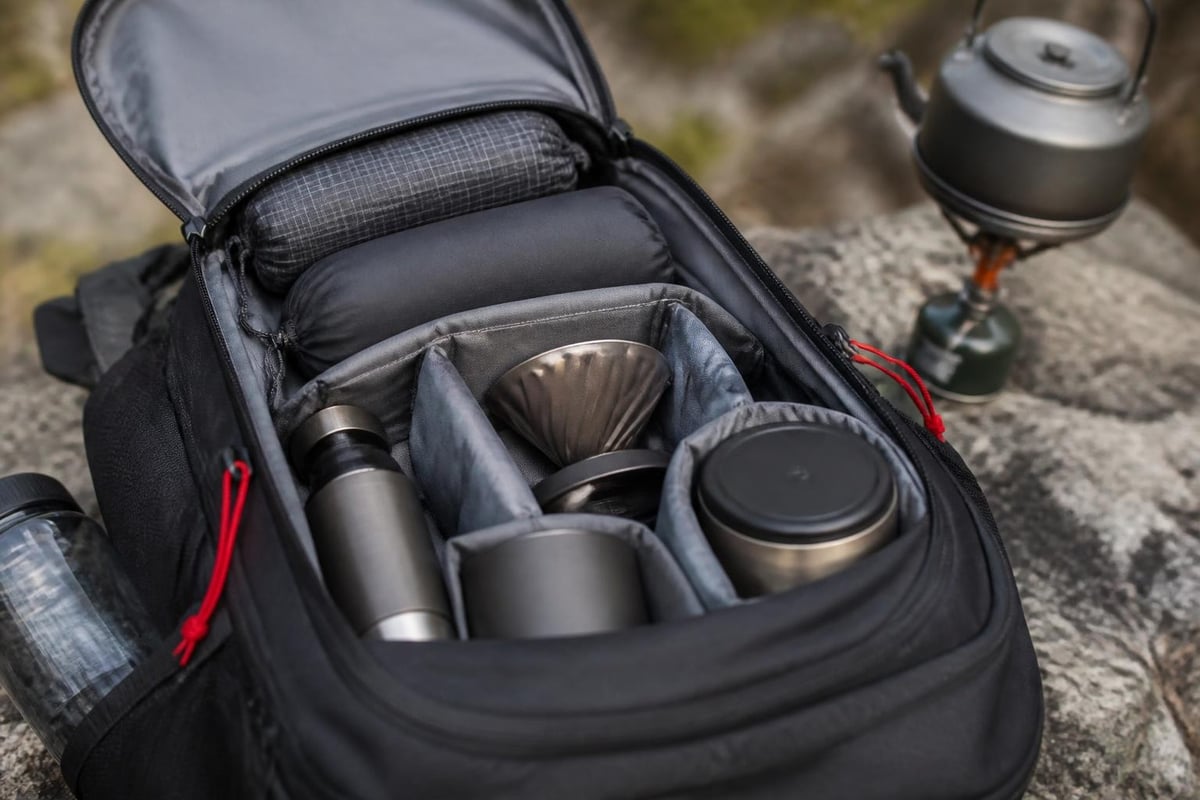
Experienced backpackers develop systems. Your pour over coffee for camping kit should nest efficiently and remain accessible without unpacking half your load.
Suggested packing configuration:
- Primary container: Titanium mug (serves as drinking vessel and packing case)
- Nested inside: Collapsible dripper, paper filters, and coffee sachets
- Secured with: Rubber band or small stuff sack
- Stored in: Top or outer pocket of pack for easy morning access
- Kettle/pot: Packed with stove and fuel (cooking system)
Total weight for a three-day solo trip: approximately 6-8 ounces including coffee, assuming 2-3 cups per day. For car camping, weight restrictions vanish and you can upgrade to ceramic drippers, proper kettles with gooseneck spouts, and whole-bean coffee with a hand grinder.
The detailed brew guide at Pixies Brew translates equally well to camping contexts, with slight modifications for outdoor variables. The core principles-proper ratios, controlled pours, patience-remain constant whether you're in your kitchen or balanced on a granite slab at 11,000 feet.
Seasonal Considerations
Summer mornings invite slow savoring. You can brew in shorts and sandals, let your coffee cool naturally in the warm air, maybe even cold-brew overnight in a water bottle if you're feeling experimental.
Fall transforms the ritual. The air bites. Steam becomes dramatic. Hot liquid in cold hands feels transcendent. Your coffee needs stay hotter longer-consider pre-warming your mug with the first splash of hot water, then discarding it before brewing.
Winter camping demands different strategies entirely. Water freezes in bottles overnight. You're brewing with gloves on, fighting wind that steals heat from every surface. Insulated mugs become essential. Some winter campers add a pinch of salt to their grounds to enhance perceived warmth and body.
Spring brings unpredictability: snow one morning, sun the next. Keep your coffee kit sealed against moisture, and pack backup filters in case morning condensation dampens your primary supply.
Advanced Techniques for Coffee Geeks
Once you've mastered basic pour over coffee for camping, refinements beckon. These techniques require minimal additional gear but deliver measurably better results.
The Inverted Bloom
Instead of blooming in the dripper, bloom your grounds in a small cup, then transfer the slurry to the filter. This ensures complete saturation and eliminates channeling caused by uneven dry patches. Adds thirty seconds and one vessel to your workflow, but perfectionist palates notice.
Temperature Staging
Brew your first half at 200°F, your second half at 195°F. The hotter water extracts brightness and high notes; the cooler water balances with sweetness and body. Requires two kettles or careful temperature management, but the layered complexity rewards the effort.
Pulsed Pouring
Instead of one continuous spiral, pour in four distinct pulses: bloom, first quarter, second quarter, final quarter. Let the slurry drain halfway between each pulse. This extends total brew time but extracts more evenly, particularly important when using coarser grinds at high elevation.
Frequently Asked Questions
How much coffee should I pack per day?
Most campers consume 2-3 cups daily, requiring 30-45 grams of ground coffee (roughly 3 tablespoons). Pre-portioned sachets eliminate guesswork and prevent over-packing. For a week-long trip, 200-300 grams serves one person comfortably.
Can I reuse paper filters to save weight?
Technically yes, but quality degrades dramatically after one use. The paper weakens, tears easily, and retains residual oils that muddy subsequent brews. For multi-day trips, pack one filter per planned cup or switch to a reusable metal filter.
What if I can't achieve proper water temperature?
At elevations above 10,000 feet, water boils below 195°F, making traditional cooling unnecessary. Simply boil and pour. At sea level without a thermometer, count 30-45 seconds after the rolling boil stops, or until bubbles cease forming at the water's surface.
How do I protect coffee from moisture and odors?
Store grounds in sealed bags with one-way valves if possible. Double-bag in ziplock freezer bags as backup. Keep coffee separate from fuel, soap, and strongly scented items. Nitrogen-flushed sachets offer superior protection against oxidation and contamination during extended trips.
Is pour over practical for group camping?
Absolutely, though you'll want a larger dripper and may need to brew in batches. A 6-cup Chemex-style brewer weighs only 5 ounces more than a single-cup dripper but serves 3-4 people simultaneously. Alternatively, recruit helpers and run multiple drippers in parallel-communal coffee preparation becomes social ritual.
The Intangible Rewards
Numbers and techniques only tell half the story. Pour over coffee for camping succeeds because it insists on slowness in a culture of rush, on deliberation in an era of convenience.
You cannot brew properly while distracted. The method demands your attention: the pour rate, the saturation, the developing aroma. For three minutes, you're nowhere else. Not planning the next pitch, not reviewing yesterday's route. Just here, water meeting coffee, hot meeting cold, chaos organizing into something beautiful and functional and temporary.
This is the pixie's gift, really-the understanding that magic doesn't require spells or wishes. It requires presence. The same sunrise hits everyone in camp, but you're the one pausing to witness it through steam rising from a cup of something you've crafted with care.
The specialty beans matter. The proper temperature matters. But equally important is the decision to claim this moment, to say that starting the day well precedes starting the day fast. Pour over coffee for camping becomes not just how you caffeinate, but how you remember why you came to wild places in the first place.
To stand still. To pay attention. To taste something real. The wilderness will wait while you brew. The trail will be there when you finish. And you'll walk it more awake, more yourself, than if you'd chosen speed over ceremony.
The morning routine you develop on the trail-deliberate, present, rich with sensory detail-deserves to follow you home. Whether you're brewing under pines or in your kitchen, the ritual of pour over coffee creates space for pause and reflection with every cup. Pixies Brew was born from exactly this understanding: that great coffee offers more than caffeine, and that even the simplest brewing method can become a moment of genuine magic. Explore the Discovery Set and find which flavor profile becomes your trail companion, your morning anchor, your reminder to stay present wherever you brew.
