


Pour Over Setup: A Complete Guide to Your Perfect Cup
The right pour over setup transforms coffee from a morning necessity into a moment of grounded intention. At its heart, a pour over setup requires just three things: a dripper, fresh coffee, and hot water. Everything else-the scale, the kettle, the particular grind-amplifies what those three elements already promise: control, clarity, and a cup that tastes exactly as it should. Whether you're drawn to the ritual for its precision or its pause, building your setup starts with understanding what each piece does and why it matters.
I remember the first time I assembled my own pour over station on a narrow kitchen counter. The V60 sat next to a borrowed kettle, a bag of beans from a local roaster, and a measuring cup because I didn't yet own a scale. That first cup wasn't perfect, but it was mine-a small victory over autopilot mornings. Your pour over setup will evolve the same way, starting simple and growing as you learn what your palate craves and your mornings allow.
Choosing Your Dripper
The dripper is the soul of your pour over setup. Each design brings a different philosophy to extraction.
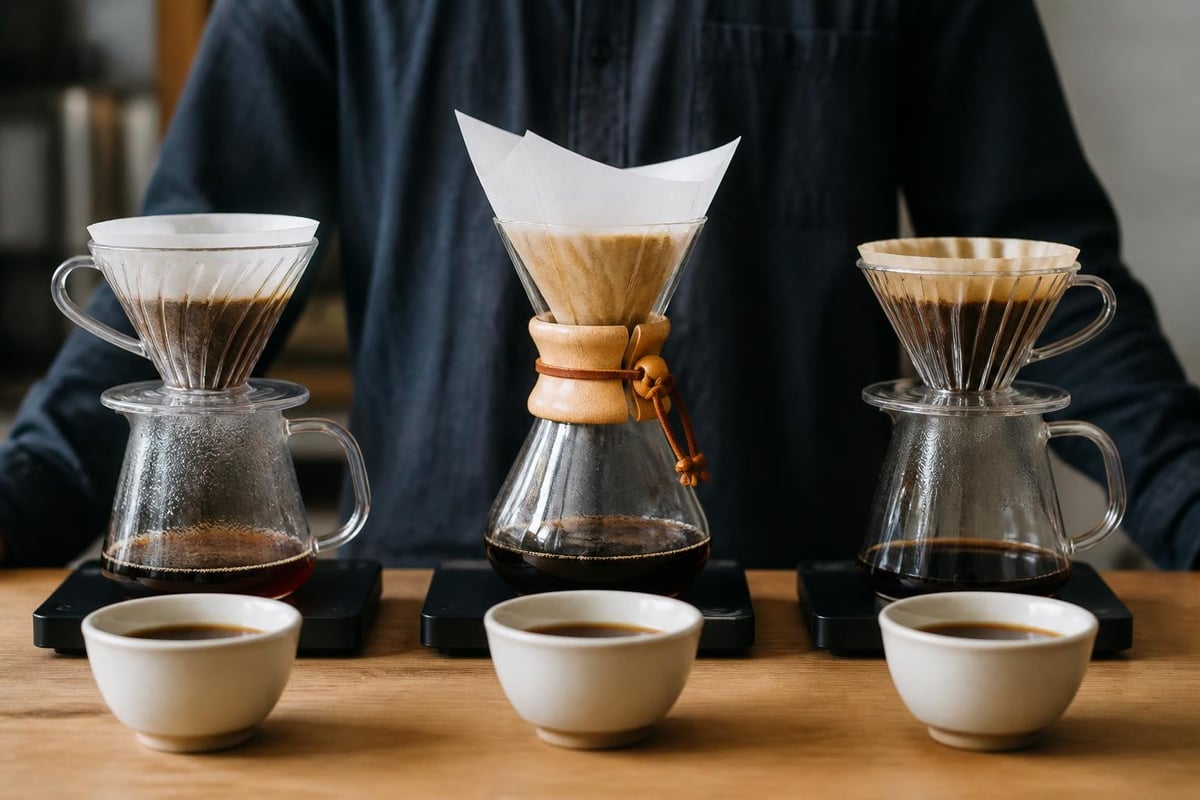
Hario V60 features a wide opening and spiral ridges that encourage water to flow quickly, giving you maximum control over brew time through your pour technique. It's the choice for tinkerers who want to experiment with different pour patterns and speeds.
Chemex combines dripper and carafe in one elegant vessel, using thick paper filters that produce exceptionally clean cups with bright acidity. The slower drawdown means less room for error but requires patience.
Kalita Wave uses a flat-bottom design with three drainage holes, promoting even extraction and forgiving slight variations in technique. It's the steady friend in your pour over setup when consistency matters more than experimentation.
Matching Your Dripper to Your Coffee
Different coffees shine through different drippers. Light roasts with delicate floral notes often sing through a Chemex's clarity, while medium roasts with balanced chocolate and fruit tones work beautifully in a V60 where you can adjust extraction on the fly. The Kalita Wave handles darker roasts gracefully, its gentle extraction preventing bitterness from over-development.
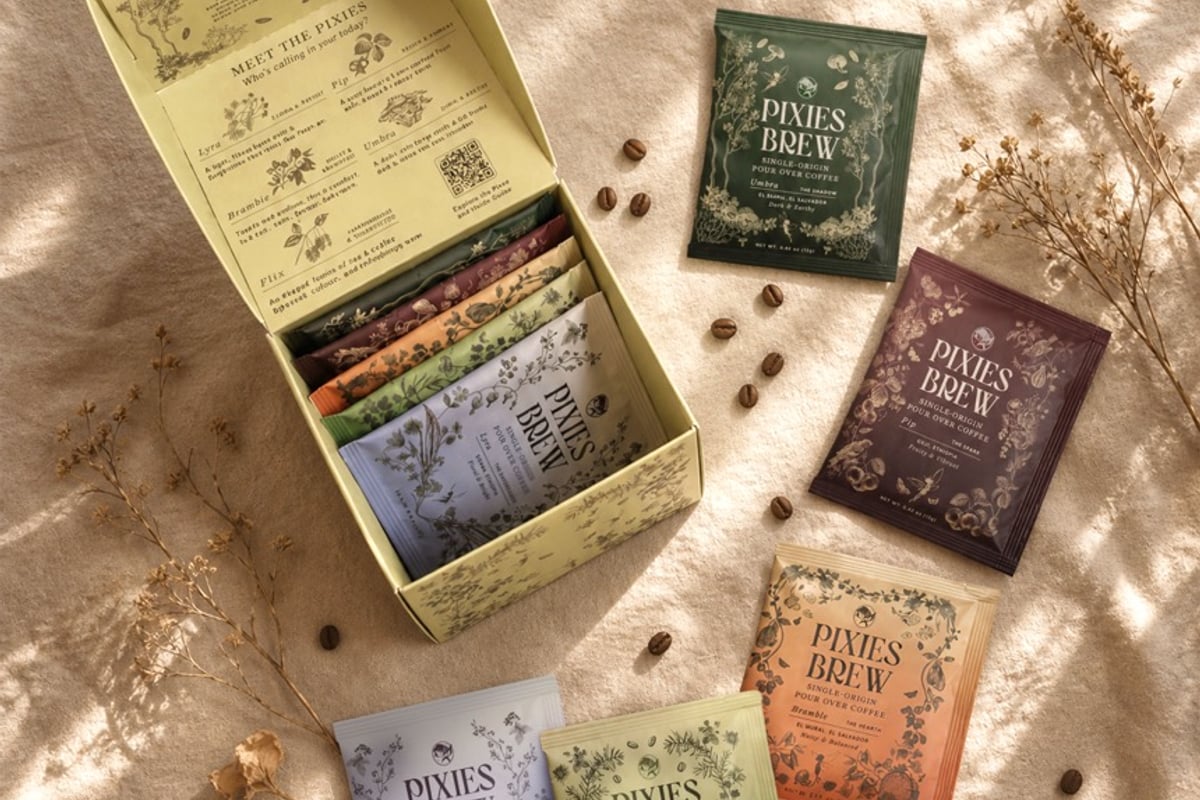
For those exploring flavor profiles, Pixies Brew offers sachets that work beautifully across any pour over setup-each blend designed to reveal its character whether you're pouring through glass, ceramic, or metal.
The Grinder Question
Your grinder matters more than any other piece in your pour over setup. Pre-ground coffee begins losing its volatile aromatics within minutes of grinding, which means the bag you opened last week has already surrendered much of what made it special.
A quality burr grinder produces uniform particles that extract evenly. Blade grinders create a mix of dust and boulders that pull both under-extracted sourness and over-extracted bitterness into the same cup-a muddy compromise no technique can fix.
| Grinder Type | Price Range | Best For | Consistency |
|---|---|---|---|
| Manual Burr | $40-150 | Travel, small batches, budget | Excellent |
| Electric Burr (Entry) | $100-300 | Daily home brewing | Very Good |
| Electric Burr (Premium) | $300-1000+ | Multiple brew methods, precision | Outstanding |
Manual grinders like the Timemore C2 or 1Zpresso JX deliver exceptional consistency at modest prices, though they require 60-90 seconds of arm work per cup. Electric burr grinders from Baratza or Fellow eliminate the effort but command higher investment.
Dialing In Your Grind
Grind size is where your pour over setup becomes personal. BeanBench's grind-size reference offers visual guides, but your taste buds are the final arbiter.
Start medium-fine-roughly the texture of granulated sugar-then adjust based on what you taste:
- Sour, thin, or weak? Grind finer to increase extraction
- Bitter, harsh, or astringent? Grind coarser to pull back
- Brew draining too slowly? Coarser grind opens the coffee bed
- Draining too quickly? Finer grind slows the flow
Baratza's V60 brew guide provides specific grinder settings as starting points, though every coffee and roast level demands its own calibration.
Water: The Invisible Ingredient
Water makes up 98% of your cup, yet it's the component most pour over setups overlook. The minerals in your water-calcium, magnesium, bicarbonates-directly affect how coffee compounds extract and how the final cup tastes.
Hardness (calcium and magnesium content) helps pull flavor from the grounds. Too little and your coffee tastes flat; too much and it becomes chalky. Alkalinity (bicarbonates) buffers acidity and can mute brightness if excessive.
The Specialty Coffee Association's research on water and extraction found ideal brewing water contains 50-175 ppm total hardness and 40-70 ppm alkalinity. Most municipal water falls outside these ranges.
Water Solutions for Your Setup
You don't need lab equipment to improve your water:
- Filtered tap water removes chlorine and some minerals (improvement for most)
- Third Wave Water packets add precise minerals to distilled water (consistent results)
- Bottled spring water varies by brand but offers predictability (convenient, moderate cost)
Temperature matters too. Water between 195-205°F (90-96°C) extracts properly. Boil your kettle, then wait 30-45 seconds before pouring, or invest in a variable-temperature electric kettle that removes guesswork from your pour over setup.
The Essential Toolkit
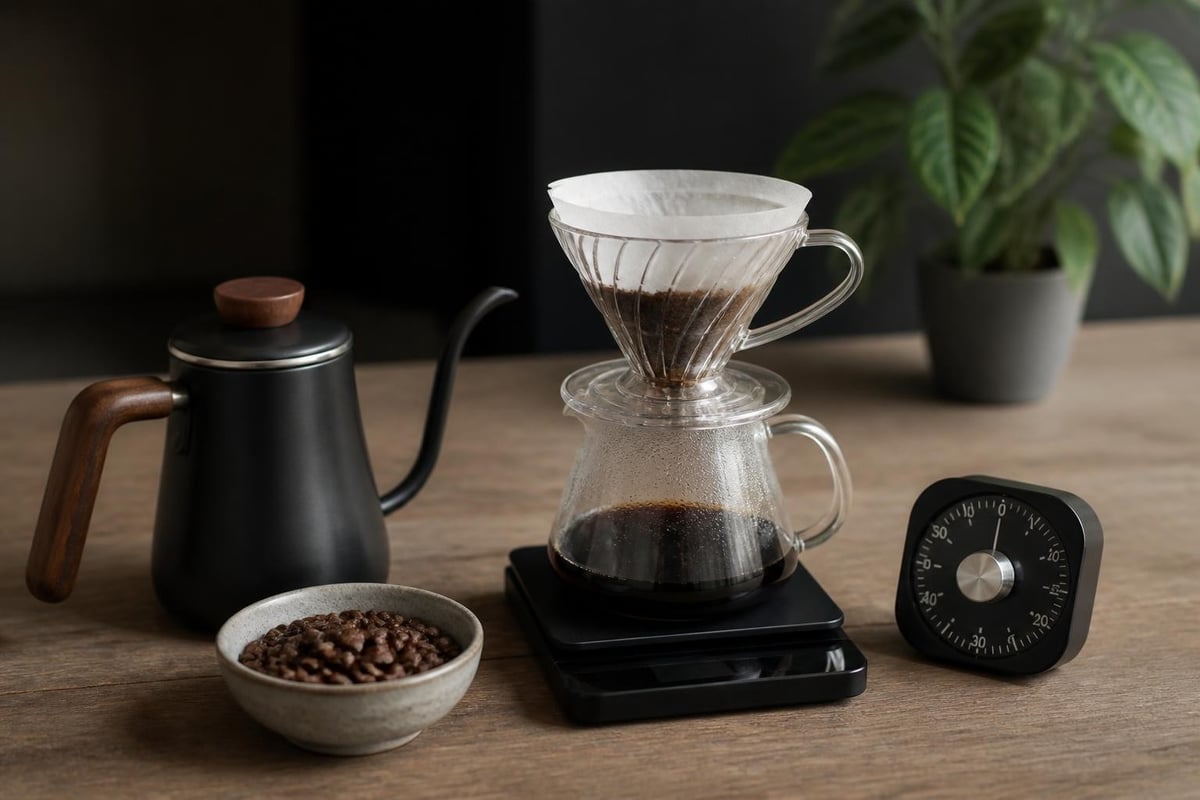
Beyond dripper and grinder, a few tools elevate your pour over setup from functional to precise:
Digital scale (0.1g precision)
Measuring by weight instead of volume accounts for bean density variations and ensures repeatable ratios. A 16:1 water-to-coffee ratio (16g water per 1g coffee) serves as a reliable starting point.
Gooseneck kettle
The narrow spout controls pour rate and placement, letting you saturate grounds evenly and avoid channeling. Electric models with temperature control add convenience to precision.
Timer
Built into most scales or on your phone, timing your pour phases and total brew time creates data to reference when you want to recreate a stellar cup or troubleshoot a disappointing one.
Quality filters
Paper filters vary in thickness and fiber structure. Bleached versus unbleached affects taste less than proper rinsing-always wet the filter to remove paper flavor and preheat your dripper.
Building Your Daily Ritual
Your pour over setup isn't just equipment-it's the framework for a practice that returns you to yourself. The ritual begins before you pour.
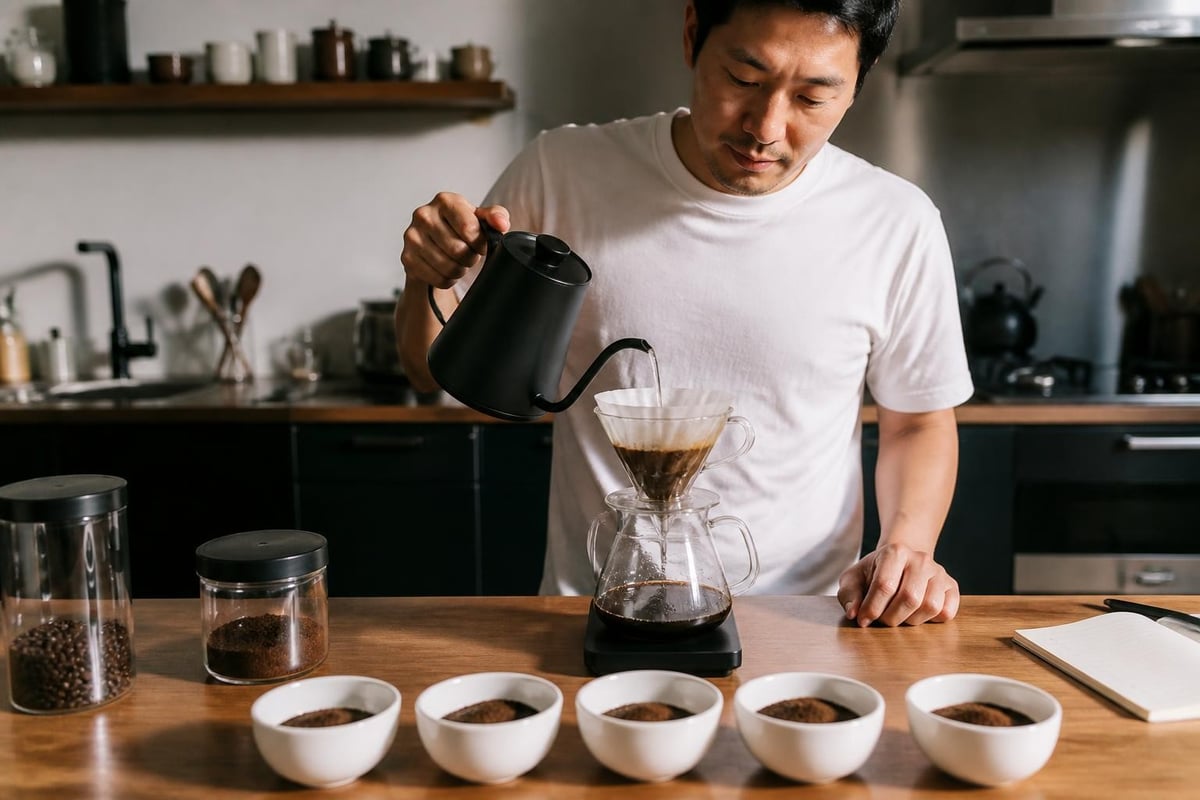
Measure your coffee. For a single cup (12 oz/350ml), use 20-22g of whole beans. Weigh them before grinding to maintain consistency across days and different bean densities.
Grind fresh. The difference between coffee ground five minutes ago and five hours ago is the difference between smelling a garden and remembering one. Grind immediately before brewing.
Heat water to 200°F. While it climbs toward boiling, set your dripper over your mug and place a filter inside. Pour hot water through the empty filter to rinse away paper residue and warm your vessel.
Discard rinse water. Add your ground coffee to the filter and shake gently to level the bed. Place everything on your scale and tare to zero.
The Pour Sequence
Seattle Coffee Gear's guide to dialing in pour over breaks the pour into phases that work across drippers:
-
Bloom (0:00-0:45) - Pour twice the coffee's weight in water (40-44g for 20-22g coffee) in a gentle spiral from center outward. This releases trapped CO₂ and prepares grounds for even extraction. Watch the coffee bed rise and bubble like earth breathing.
-
Main pour (0:45-2:30) - Add remaining water in steady, concentric circles, maintaining a consistent water level about halfway up the dripper. Pour in 2-3 additions rather than one continuous stream, allowing the slurry to settle briefly between pours.
-
Drawdown (2:30-3:30) - Let gravity finish the work. Total brew time from first pour to last drop should land between 3:00-4:00 for most recipes. Shorter suggests under-extraction; longer points to over-extraction or grind issues.
The act of pouring demands presence. Your hand steadies over the kettle. Your eyes track the water's path through the grounds. Your nose catches the bloom's first release of aroma-berry, caramel, earth, whatever story these particular beans carry. This is why people build a pour over setup instead of pressing a button.
Tailoring Your Setup to Your Life
Not every morning allows for four-minute rituals with three-decimal precision. The beauty of a pour over setup is its scalability.
Travel setup: Foldable silicone drippers like the Munieq Tetra or compact AeroPress fit in luggage alongside a hand grinder. Pre-measure beans into small containers for simplified mornings in unfamiliar kitchens.
Office setup: A simple V60, electric kettle, and pre-ground coffee (ground that morning at home) transforms a break room into a refuge. Even without a grinder, fresh beans ground hours ago surpass stale office drip.
Simplified home setup: If you're drawn to pour over's clarity but not its choreography, consider specialty-grade pour-over sachets. Perfect for slow mornings, travel days, or anywhere you need a moment back to yourself, the Pixies Brew Discovery Set brings all five specialty-grade blends together in one box, so you can taste them all and find the one that's yours-specialty coffee ground fresh and nitrogen-flushed to stay fresh, requiring just a cup and hot water.
Seasonal Adjustments
Your pour over setup shifts with the calendar. Winter's dry air and cold beans may require slightly finer grinds or hotter water to maintain extraction. Summer's humidity makes coffee absorb moisture faster; what brewed perfectly in January might taste dull in July if stored improperly.
Store beans in an airtight container away from light and heat. Buy only what you'll use within two weeks of the roast date. Coffee peaks 5-14 days post-roast, then begins a slow decline-still drinkable but less vibrant.
Common Setup Challenges and Solutions
Even experienced brewers encounter frustrating cups. Your pour over setup reveals problems clearly:
| Problem | Likely Cause | Solution |
|---|---|---|
| Weak, sour cup | Under-extraction | Grind finer, use hotter water, extend brew time |
| Bitter, harsh cup | Over-extraction | Grind coarser, lower water temp, shorten brew time |
| Uneven drawdown | Channeling | Improve pour technique, level coffee bed, check grind uniformity |
| Cloudy cup | Agitation or fines | Pour more gently, grind slightly coarser, rinse filter thoroughly |
Epicurious's overview of pour-over equipment notes that many perceived "gear problems" actually stem from stale coffee or inconsistent variables. Before buying new equipment, audit your fundamentals: bean freshness, grind consistency, water quality, and technique.
The Learning Curve
Building a pour over setup is immediate. Mastering it is endless-and that's the point.
Your first dozen cups will teach you more than any guide. You'll learn how your particular grinder behaves, how your water tastes, how your hands move. Some mornings will produce transcendent cups that justify every piece of equipment and every careful measurement. Others will brew disappointment despite following the same recipe, because coffee is agriculture and agriculture is variable.
CoffeeBar's downloadable brew guide offers printable recipes for V60, Chemex, and Kalita-reference sheets to tape inside your cupboard door until the ratios and times become muscle memory.
Track what works. Note the coffee, grind setting, water temperature, total time, and how it tasted. After a month, patterns emerge. You'll discover you prefer brighter coffees ground slightly coarser than the recipe suggests, or that your best cups consistently brew 15 seconds faster than the guide predicts. This personalization transforms a pour over setup from someone else's recommendation into your own craft.
Exploring the Ritual Deeper
For many, the pour over setup becomes a meditation. The familiar sequence-measure, grind, heat, pour-creates a container for presence that busy lives otherwise lack.
At Pixies Brew, the philosophy centers on coffee as more than caffeine. Each cup offers a moment of pause and reflection, a threshold between what was and what comes next. Your pour over setup builds that threshold into physical form: the kettle's weight in your hand, steam rising through morning light, water darkening as it meets the grounds.
The ritual doesn't require perfection. Some mornings you'll rush through the bloom or forget to start the timer. The coffee still tastes good. Other mornings allow for full presence-maybe it's raining, maybe you woke early, maybe you simply need this particular kind of quiet. The setup accommodates both.
This flexibility matters. A pour over setup that demands ideal conditions becomes a chore. One that forgives variation while rewarding attention becomes a practice you return to willingly, day after day, year after year.
Frequently Asked Questions
How much should I spend on a beginner pour over setup?
A quality starter setup-Hario V60 ($8-25), Hario Skerton hand grinder ($40-50), basic gooseneck kettle ($25-40), and digital scale ($15-25)-costs $90-140 total. It's enough to produce excellent coffee while you learn what matters most to your taste.
Can I use regular tap water?
Yes, if your tap water tastes good on its own. Filter it to remove chlorine and sediment. If your tap water tastes minerally or flat, bottled spring water (not distilled) improves results significantly.
How long do whole beans stay fresh?
Peak flavor lasts 5-14 days after roasting. Beans remain good for 3-4 weeks if stored properly in an airtight container. After a month, staleness becomes noticeable-not undrinkable, just less vibrant.
What's the best grind size for pour over?
Start with medium-fine (like table salt or fine sugar) and adjust based on taste and brew time. If your cup drains in under 2:30 minutes, grind finer. If it takes over 4:00 minutes, grind coarser.
Do I need an expensive grinder?
Grind consistency matters more than price. A $50 manual burr grinder outperforms a $30 blade grinder every time. If you brew daily and can afford $150-250, an electric burr grinder adds significant convenience without sacrificing quality.
How do I clean my pour over setup?
Rinse the dripper with hot water after each use. Deep clean weekly with mild dish soap. Descale your kettle monthly if you have hard water. Keep your grinder burrs clean-brush out retained grounds and oils every few weeks.
The Setup That Fits Your Morning
Your ideal pour over setup serves your life, not the other way around. Maybe that's a full station with electric grinder, precision kettle, and multiple drippers for different moods. Maybe it's a single V60, hand grinder, and the kettle you already own. Maybe it's exploring different pour-over formats to find which ritual speaks to how you want to meet your mornings.
The constant across every setup is intention-choosing freshness over convenience, presence over autopilot, ritual over routine. Whether you build your system piece by piece or discover it already crafted in specialty sachets, the practice of pour over returns you to the moment, grounds you in your senses, and offers what all good rituals do: a small transformation disguised as a simple cup.
Your pour over setup is ready when you are. Start simple, stay curious, and let each cup teach you what the next one needs.
The best pour over setup is the one you'll use tomorrow and the day after-simple enough to fit your mornings, thoughtful enough to reward your attention. Whether you build your ritual from individual tools or discover it through ready-to-brew sachets, Pixies Brew brings specialty-grade coffee and intentional ritual together, offering a moment of pause and reflection with every cup. Each blend carries its own story, waiting for you to pour it into being.
